5 Delicious and Healthy Pumpkin Recipes (+ How to Roast a Pumpkin)

5 Delicious and Healthy Pumpkin Recipes (+ How to Roast a Pumpkin)

Pumpkin is a super nutrient dense, energy boosting and weight-loss-friendly food. It’s also delicious, versatile in cooking, and cheap!

 This ¼ of a pumpkin cost me less than a dollar (here in Iraq) for 3.5 kilos — that’s about 8 pounds of pumpkin! It sure beats canned pumpkin both in price and quality!


I am so excited that we’re entering into fall because winter squash and pumpkins are one of my favorite vegetables! My favorite is actually the Japanese kabocha squash (which I got introduced to when living in Japan and would simply roast it and then dig in with a spoon — it’s naturally sweet and super yummy!). Luckily kabocha is now commonly available in the U.S. so if you haven’t yet tried it, please do — you can sub for any recipe calling for butternut squash.


Unfortunately, no kabocha here in Iraq, but what they grow here in Northern Iraq seems similar to the Cinderella pumpkin, also known as a Long Island Cheese Pumpkin (which I just learned from Google), and it’s quite delicious and versatile as well!


Health Benefits of Pumpkin:


Pumpkins are a super nutrient dense food, meaning they are low in calories (less than 50 calories in one cup) while being high in vitamins, minerals, antioxidants (esp. Vitamin A and beta-carotene). It’s also a good source of fiber. And since it’s 94% water you’ll also be keeping your body hydrated!


You get 245% of the RDI for Vitamin A in just 1 cup of pumpkin!


“Vitamin-A is a powerful natural antioxidant and is required by the body for maintaining the integrity of skin and mucosa. It is also an essential vitamin for good eyesight. Research studies suggest that natural foods rich in vitamin-A may help the human body protect against lung and oral cavity cancers.” (1)


Pumpkins are good for (2)…


  • Boosting your immune system…due to its high vitamins A and C content, which helps boost your immune system, as well as vitamin E, iron and folate.
  • Promoting weight loss…due to it’s high nutrient content while having under 50 calories per cup, and being a good source of fiber which can also help suppress appetite.
  • Protecting your eyesight…due to high vitamin A content, as well as lutein and zeaxanthin contents, it can protect your eyes against sight loss as you age.
  • Lowering your risk of certain cancers…due to carotenoids, which function as antioxidants, and are linked to lower risks of stomach, throat, pancreas and breast cancers.
  • Promoting heart health…due to its rich potassium, vitamin C, fiber, and antioxidant content.
  • Promoting skin health…due to beta-carotene which acts as a natural sunblock, and vitamins C and E, as well as lutein and zeaxanthin, which help keep your skin strong and healthy.

Roasted Pumpkin

I find the easiest way to cook pumpkin, or winter squash, it to simply cut in in half (or quarters, depending on size) and roast it in the oven. Once it’s cooked it will be super simple to scoop out the flesh (or you can eat the skin of some varieties, like kabocha).

Step 1. Pre-heat oven to 400. Cut pumpkin in half or quarters and remove seeds, and brush inside with coconut oil, avocado oil, or EVOO.

Step 2. Place cut side down on baking sheet (lined with parchment paper for easy clean-up)

Step3. Bake about 35 minutes or until very soft (just try piercing the flesh with a fork or knife to test) — mine almost looked like I over roasted it because the skin was turning brown, but actuallly the inside flesh was perfectly cooked!

Step 4. Let cool then scoop out flesh and store in a glass container for later use in any of the recipes below. It will last about a week in the fridge or you can freeze portions (a great alternative to canned pumpkin). If you’re trying kabocha I highly recommend eating the skin for extra fiber, vitamins and minerals — and I also just read that you can do the same for cinderella pumpkins so I’ll have to try it next time.

Creamy Roasted Pumpkin Soup by Cookie and Kate

This soup is soooo good! I was honestly skeptical about the combination of onions and garlic with the sweet spices (cinnamon and nutmeg) but trust me, it’s really good! And don’t skip the toasted pumpkin seeds on top when serving — they add nice texture and they are a rich source of Magnesium (a mineral most of us are deficient in without knowing it)

I just made the following alterations to the recipe:

  • I used water instead of veggie broth
  • I used homemade coconut, cashew, oat milk instead of canned coconut milk (because I already had some in my fridge). Get the recipe here.
  • I added a few dashes of pumpkin pie spice in addition to the cinnamon and nutmeg (freshly grated nutmeg). I also served it with additional freshly grated nutmeg on top which kicks it up a notch, if you enjoy nutmeg, as you should!

Pumpkin Pie Chia Pudding, recipe from my detox program (coming soon this fall!)

INGREDIENTS (for 2 servings):

  • 1 ½ cups unsweetened almond or coconut milk (in a carton, not canned)
  • ¼ cup chia seeds
  • 1 cup roasted pumpkin, or ½ cup canned pumpkin puree
  • 1 tsp cinnamon
  • ½ tsp ground ginger
  • ½ tsp nutmeg (I just freshly grate the nutmeg into the blender and don’t measure; actually for all the spices you can just add without measuring and adjust to your taste preference. Depending what spices you like or don’t like you can adjust, or just use a pumpkin pie spice blend if you like clove as well.)
  • Dates or maple syrup (optional, to taste) → I’ve made this without any sweetner and the pumpkin and spices are enough to give it some sweetness, but for more of a dessert treat I recommend about 2 large dates or 1 Tbsp maple syrup.

Blend the pumpkin with milk, spices and sweetener of choice (I use 2 dates), then add to a glass jar with the chia seeds, screw on the lid and shake well. If you’re using canned pumpkin puree you can skip the blending and just put everything in the jar directly and shake. Then refrigerate for 3-4 hours or overnight. If you’re in a hurry you could enjoy in as little as 30 minutes but it’s best when you give time for the chia seeds to fully expand and it then turns into more of a pudding consistency. 

Pumpkin Protein Smoothie, another super satisfying breakfast recipe from my detox program

INGREDIENTS (for 1 serving):

  • 1 cup unsweetened almond milk
  • 1 tbsp almond butter (I make my own; Cookie & Kate has a great tutorial on how to make homemade nut butter)
  • 1 scoop vanilla plant protein powder (or sub 2-3 Tbsp hemp seeds plus ½ tsp pure vanilla extract)
  • ½ banana (preferably frozen)
  • 1 tsp cinnamon (or pumpkin pie spice)
  • 1 cup roasted pumpkin (or could sub canned pumpkin puree) → Note: the actual recipe in my detox program uses 3 grated carrots, but I was looking for ways to use up all my roasted pumpkin and it was the perfect substitute, but just know that you could also use carrots if you prefer more of a carrot cake taste.

Blend and enjoy! Note: If it’s quick thick I like to serve in a bowl, with some some freshly grated nutmeg on top, but you can also just add extra almond milk as needed to thin it out.

Turkish Pumpkin Dessert (with much less sugar!) — Note: The photo was taken after I had already started eating it, whoops!

This is my healthy take on this Turkish recipe of candied pumpkin with ground walnuts or pistachios served on top. → Check out my video demo of this recipe on IGTV (my first time posting to IGTV, yah!). It’s super simple though and really doesn’t need a demo (smile). 

Step 1. Using the same roasted pumpkin that I’ve been using for all these recipes, scoop some of that into a small dessert bowl. 

Step 2. Mix ~1 tsp raw honey with about 1-2 tsps of hot water (more or less honey to taste, depending how sweet your pumpkin is or how sweet you like things, but erring toward the less sweet side to keep this dessert healthy). 

Step 3. Then, simply mix the honey with water and pour over your pumpkin. 

Step 4. Grind some walnuts in a spice grinder, use a mortar and pestle or just chop finely, then sprinkle on top of your pumpkin.

Step 5. If you like, add a dash of cinnamon (which is always good to add to desserts because studies have shown that cinnamon can decrease the amount of glucose that enter your bloodstream after a meal and may help reverse insulin resistance which leads to diabetes; for more check out my blog on the health benefits of cinnamon).

Step 6. Enjoy!

Thai Pumpkin in Coconut Milk Dessert, by Thaitable

This recipe is super simple — even simplier than the Turkish dessert! The only variation I recommend is using coconut sugar if you don’t have the palm sugar called for in the recipe and start with much less than called for in the recipe and sweeten to taste (trying not to add too much). I also recommend garnishing with some toasted sesame seeds.

5 Healthy Gluten-Free Snack Ideas

5 Healthy Gluten-Free Snack Ideas

5 Healthy Plant-based Gluten-Free Snack Ideas


I recommend that everyone try a gluten-free diet for at least 30 days to find out if they could have a gluten sensitivity (immune response to gluten) or gluten intolerance (difficulty digesting gluten). That’s what I have my dad doing now to see if gluten might be responsible (at least in part) for his increased joint inflammation and pain, especially since learning that he has Hashimoto’s.


While there are tests to learn if you have a gluten allergy (celiac disease), you would need to have genetic testing done to be sure whether you have a gluten sensitivity. If you’re interested in, you can order the test by mail at glutenfreesociety.org.


However, the alternative to costly testing is to do an elimination diet. Simply remove gluten for 30 days, then reintroduce it (without changing other variables in your diet/lifestyle) and see how you feel. 


So here are some healthy gluten-free snacks to help you out. But you can also enjoy then any time of course, whether you’re doing a gluten-free diet or not.


How do I define a “healthy” snack? 


For me, “healthy” means that it meets the following criteria:

– Mostly (if not 100%) whole foods, high in fiber (any packaged foods/beverages should be minimimally processed and without harmful additives),

– Mostly (if not 100%) plant based,

– Organic if possible (esp. if on the EWG’s dirty dozen list),

– Non-GMO if containing corn or soy (note: anything certified organic will also be non-GMO),

– Limited amount of refined oils, esp. oils with high omega-6 content (canola, soybean, corn and sunflower oil are the common ones). It’s best to get your fat from whole food sources such as avocados, nuts and seeds, but a high quality extra virgin olive oil is also healthy, or small amounts of avocado oil, coconut oil or ghee from grass-fed animals (not vegetable ghee). See my post on how to buy good olive oil. And che


Here are 5 delicious and healthy gluten-free snack ideas for you, taste-approved by my dad (smile):

1. Peanut butter and jelly on puffed red rice and quinoa thins. I use this organic peanut butter (which has no oil or sugar added, and tastes great; unlike Jif which contains fully hydrogenated oils, sugar, and 3 times more salt!), and organic strawberry jam with less sugar (and organic because strawberries are #1 on the EWG’s dirty dozen list). This is the version I made for my dad (to replace his usual PB&J), but I would make mine even healthier by using almond butter (which has a better fatty acid profile and a little stronger nutritional profile), and chia seed jam (with a tad of maple sryup or pureed dates added depending on sweetness of the berries).

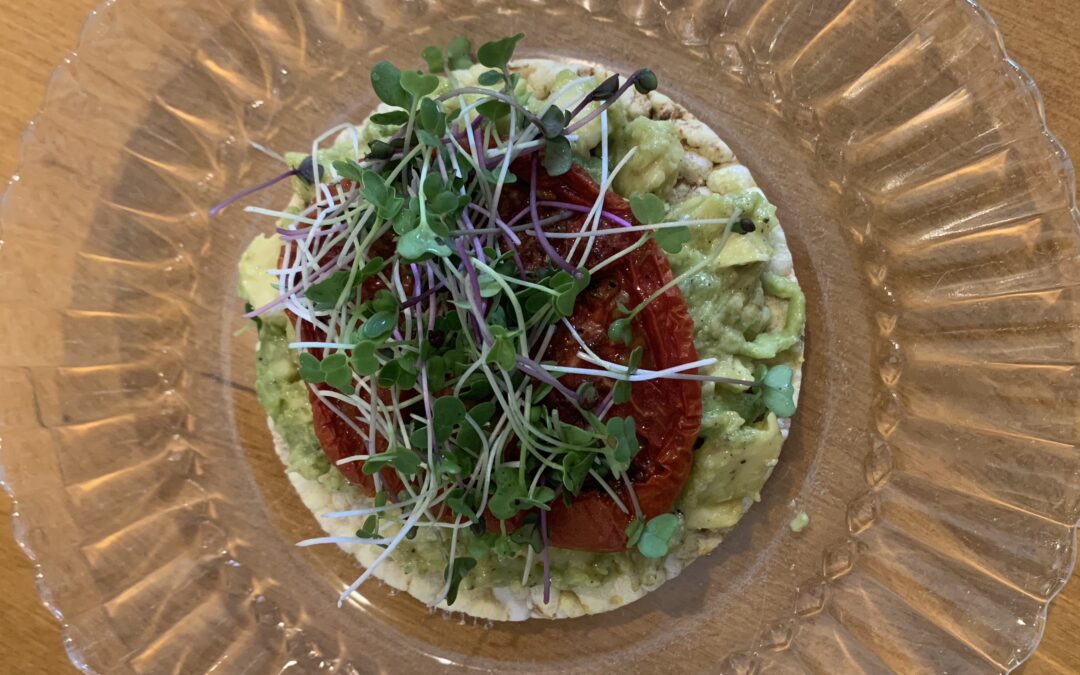
2. Avocado “toast” on non-GMO puffed corn thins or rice cakes, topped with a drizzle of high quality olive oil (from this olive oil club; get your first bottle for $1), black pepper (a generous amount — really goes well with avocado!), homemade spicy slow roasted tomatoes (recipe on the top of Teeny Tiny Spice Company’s Perfection Spice Rub, which goes great on so many things!), and some sunflower microgreens (my favorite!). 

3. Black bean hummus with veggie sticks and Mary’s Gone Crackers. I make my own black bean hummus without following a recipe. I blend the following ingredients in a food processor, then taste and adjust seasoning as needed: one can of black beans (BPA-free), about 2 Tbsps tahini, a drizzle of EVOO, a squeeze of lemon juice, a few dashes of sea salt (depending if your beans were already salted), a dash or two of smoked paprika, and a generous amount of cumin (because I love it and it’s so good for you!). Cumin is a great addition to hummus as it helps with digestion, among other health benefits.

4. Refried pinto beans (oil free) mixed with Trader Joe’s Pepita Salsa, and served with Mary’s Gone Crackers (the seaweed and black sesame are my favorite, because I love Japanese food). I simply mix about equal parts of each, and it kind of reminds me of cream cheese mixed with salsa (which I used to love as a kid).

5. Fresh fruit. Fruit is always a great snack option (or dried fruit in moderation as long as it doesn’t have added sugar and oil). Some people these days have fruit fear because it contains high amounts of sugar, but as long as you’re eating the fruit whole and fresh it also contains a lot of water (great for hydration!) and fiber. Here’s a few of the way I love to enjoy fruit:

  • an apple or banana with almond butter,
  • a bowl of berries with non-dairy “milk” and some chia seeds (soaked for at least 15 minutes) or homemade granola (using gluten-free oats; oats are naturally gluten-free but often processed in the same facility used for wheat), 
  • sliced peaches or apple with melted coconut butter (not to be confused with coconut oil; coconut butter is the coconut flesh ground into a spreadable paste like peanut butter so it contains fiber and other nutrients; I like this organic creamed coconut which is the same as coconut butter and much cheaper than other brands, but just the same). Regarding non-dairy “milk” — I recently tried Ripple’s pea protein “milk” (unsweetened of course) and loved it as a high-protein milk alternative. However, I don’t have it (or other milk alternatives, such as non-GMO soy milk, almond or cashew milk) every day because it’s still a processed food. Just make sure to always buy unsweetened milk alternatives (better to control the sweetness yourself), and avoid any with carrageenan as an ingredient.
  • stewed apples –> great for the microbiome (check out my blog: 3 Tips for a Healthy Microbiome to learn more and get my recipe),
  • or just plain fruit (always an easy, healthy and delicious snack option!)

While you could enjoy most of these snacks (minus the PB&J maybe) with corn chips (which are gluten-free), I didn’t include those in my snack list because they are cooked with refined oils high in omega 6 content. The crackers have no added oil. However, I do love corn chips with guacamole from time to time! I just always buy non-GMO stone ground blue corn tortilla chips (Trader Joe’s makes ones with sprouted amaranth and chia seeds added).


Bottom line: If you’re on a gluten-free diet don’t rely on processed/packaged gluten-free snacks. There are so many healthy, cheap and easy to make options available! And these snacks are great even if you aren’t on a gluten-free diet. If you haven’t yet tried it, I recommend at least experimenting with a gluten-free diet for 30 days to learn if you have a gluten sensitivity or intolerance, but noticing whether you feel better without gluten in your diet. Just make sure to check labels.

How to Make the Most Delicious, and Nutritious, Açaí Bowl

How to Make the Most Delicious, and Nutritious, Açaí Bowl

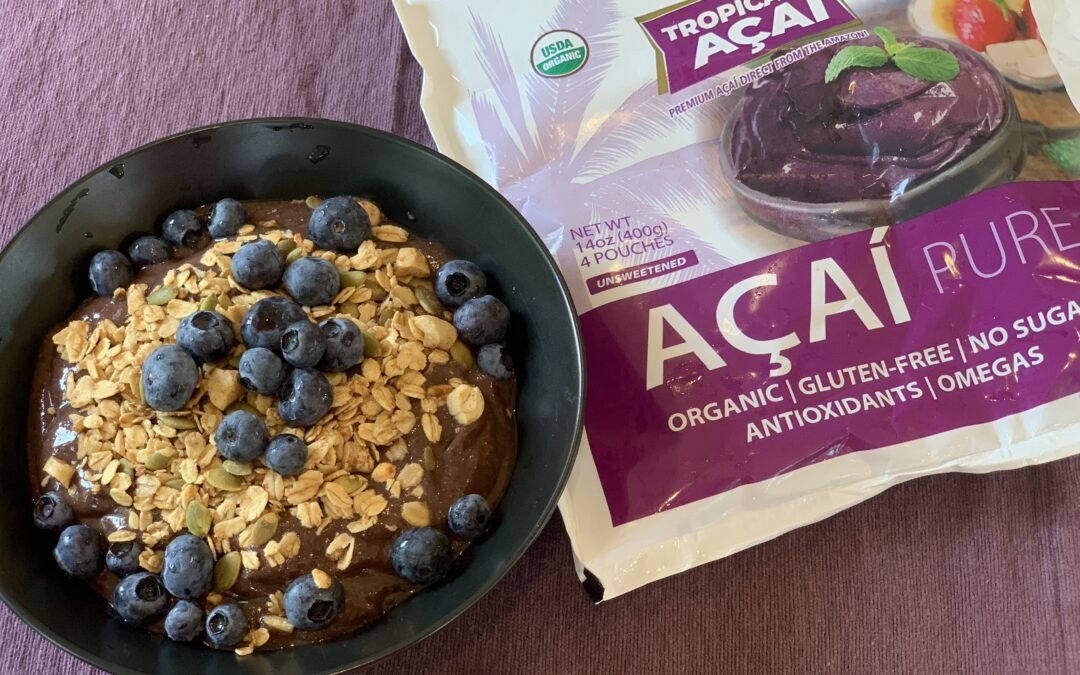
I remember having my first acai bowl in Brazil years ago, and loving it, then being disappointed when I returned home and couldn’t find acai anywhere. 


But now, it has finally hit the U.S. market! While I started seeing it a few years ago pop up in different places, I am now seeing it everywhere. Even most grocery stores now sell the frozen acai smoothie packets.


However, after trying an acai bowl at a few different places, while at the beach in Delaware last week, I have concluded that it’s much better (and cheaper) to just make your own.


Most places sell an acai bowl for $9-12 and its either way too sweet, doesn’t have enough acai, or the granola they top it with just isn’t that good.


As I do have experience with the real acai bowls/smoothies as done in Brazil, I believe my upgraded version is just as good and while being packed with extra goodness (I’m talking about greens of course! And some flaxseed.)


Seriously, my dad has even gotten hooked on acai bowls and is loving the ones I make for him, and he says he can’t even taste the greens — and I put a BIG handful!


So, what is açaí?


Açaí (pronounced, A-SA-EE), is a small purple berry (grown on a type of palm tree) which is native to the Amazon Rainforest, and thus very popular in Brazil. It gained popularity due to its high antioxidant content, while having nearly zero sugar, so it is considered a “superfruit.”


And what is an açaí bowl?


Traditionally it is simply a frozen puree of acai berries blended with a little guarana syrup (to sweeten) and either blended with banana and granola, or simply served with sliced banana and granola on top. They are very popular for boosting one’s energy!


How to Make the Most Delicious, and Nutritious, Açaí Bowl

Of course I always want to add greens to anything I make, so here’s how I like to make my acai bowl, for a more nutrient-packed filling breakfast…


Ingredients:

  • 1 frozen acai packet, unsweetened
  • 1 frozen banana
  • Some other type(s) of fruit (either some frozen pineapple, half a peach, some frozen wild blueberries, etc.)
  • 1 BIG handful of baby greens (I use a mix of spinach and kale)
  • 1 Tbsp ground flaxseed (I love this sprouted ground flaxseed)
  • Granola (I prefer homemade, using this recipe, but adding half the amount of coconut oil and maple syrup. And here’s another healthy granola recipe option that’s similar, with even less oil and sugar added. If you’re doing store bought be sure to check the sugar content and get one that has less sugar.)
  • Extra fruit for topping


Directions:


Start by blending the greens with the extra fruit (such as peach slices and wild blueberries in my case at the moment), then add the acai packet, ground flaxseed, and frozen banana. If you have a Vitamix use the “frozen dessert” setting and the tamper. If you don’t have a vitamix you can do this in a food processor or regular blender, but you might need to add a little liquid (either some ice cold coconut water, nut milk, or a little fresh juice).


When finished, pour into a bowl and top with some fresh fruit of your choice (berries and sliced banana go great) and a good amount of granola. Pro tip: pour some granola in the bowl first, then pour the acai mixture, and then sprinkle extra granola on top!


Enjoy!

Note: If you’re making two servings, you could use only 1 packet of acai and extra wild blueberries (or other frozen berries) and/or other fruit. Some frozen mango would also be delicious. Experiment and see what you like best!

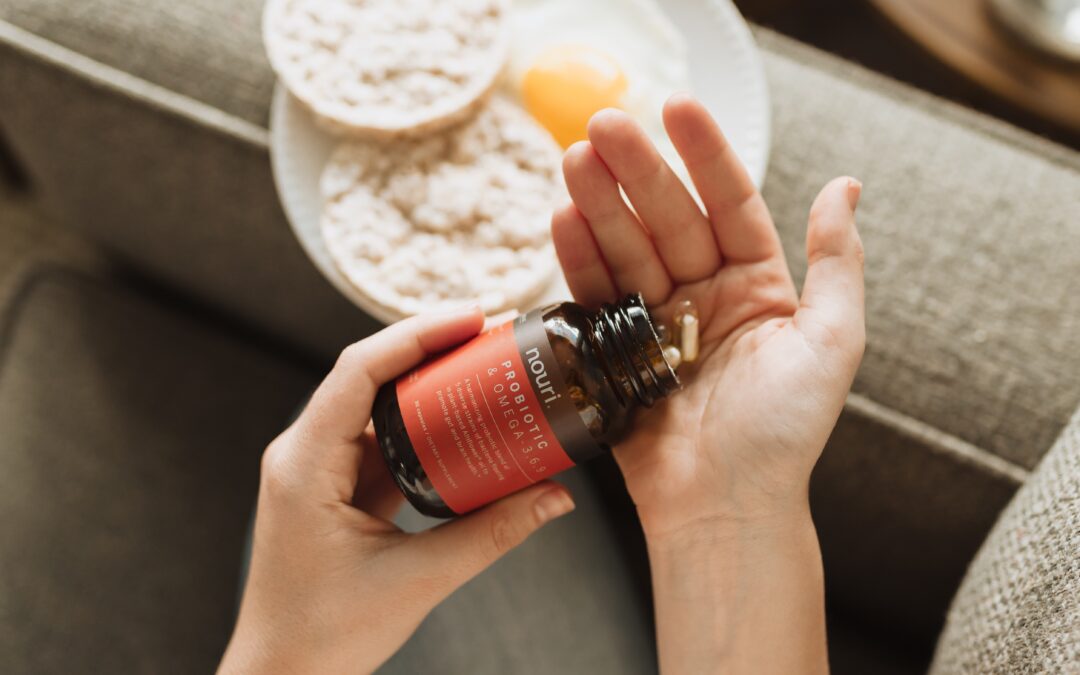
Why You Should Stop Taking Probiotic Supplements

Why You Should Stop Taking Probiotic Supplements

If you’ve been taking probiotic supplements thinking they’re good for you and an essential supplement that everyone should be taking, you’re not alone.

I used to think the same.


Until I learned that probiotic supplements are likely doing more harm than good for your microbiome from an interview on the Food Revolution Network with Dr. Zach Bush.

Probiotics are undoubably important, as younger and younger generations have developed chronic diseases that were previously unheard of due to disruptions in the gut microbiome, but what’s the best way to get more probiotics to support a healthy microbiome?

Dr. Zach Bush, a physician who used to prescribe probiotics to his patients, now prescribes nature and wild-ferments instead.


What’s the problem with probiotics supplements?

For a healthy microbiome, diversity is critical. It’s been estimated that an optimal healthy human gut should contain between 20-30,000 species of bacteria. And the greater the diversity, the healthier the microbiome. 


So if we’re overwhelming the gut microbiome with billions of copies a day of the same few species, we’re going to end up creating a monoculture rather than a diverse ecosystem. Therefore, chronic use of a probiotic is a bad idea.


According to a study published in September 2018 in Cell, one of the most rigorous science journals in the world showed that taking probiotic supplements following an antibiotic treatment actually resulted in a suppressed microbiome and slower recovery to pre-antibiotic levels of microbiome diversity. 

Better (and cheaper) alternatives to probiotic supplements:

1. Spend more time in nature. To combat narrowing microbiomes, and replenish them after antibiotics, Dr. Bush recommends getting out of our modern, manufactured ecosystems and out into nature. We are what we surround ourselves with. He prescribes patients to visit different ecosystems, such as the moutains, beach, and swampy areas — and get your hands or feet in the dirt and breath in the fresh air to take in microbes that will support the health of your microbiome.

2. Eat wild-fermented foods. While a probiotic supplement will have only a few different strains of probiotics, raw wild-fermented foods will have hundreds of different strains! And when you a variety of different types of fermented foods/veggies, you’ll be getting an even greater diversity of probiotics. And the added bonus is that fermented veggies are so much cheaper and can be very easily made at home. But if you are buying fermented foods, note that the majority of fermented foods on the market are actually made with dairy-based probiotics. So you should read labels, and choose wild fermented foods like sauerkraut, miso, and kimchi, which have been exposed to the air for long periods of time and include a wider biodiversity of beneficial microbes. And if you don’t like traditional sauerkraut, try some beet apple kraut or any raw lacto-fermented veggies — just be sure vinegar was not used, or pasteurization, both of which would significantly diminish the beneficial bacteria/probiotics. Check out the FAQs on Oregon Brineworks website for more explanation about lactic-acid fermentation. To make your own wild ferments check out culturesforhealth.com. Just a forkful of sauerkraut a day is all you need.

Bottom Line:

Do not try to micromanage a complex system like the microbiome.

According to dr. Zach Bush, “probiotics can be a valuable tool in the context of a comprehensive treatment approach, but as with any other tool, excessive or inappropriate use can be problematic.”

Nourish a diverse microbiome by getting out in nature, in different ecosystems, and consume some type of wild-ferments daily. Try making your own to save money!

To learn why a healthy microbiome is SO important, and some other tips for nourishing your microbiome, check out my blog post 3 Tips for a Healthy Microbiome.


Sources:

http://zachbushmd.com/wp-content/uploads/2017/04/Why-Probiotics-Dont-Always-Work-EG-BB-edit.pdf

https://neurohacker.com/restore-gut-health-the-science-behind-a-healthy-gut-microbiome

My Top 7 Kitchen Tools for Making Healthy Eating Easier

My Top 7 Kitchen Tools for Making Healthy Eating Easier

1. VitamixI don’t know what I’d do without my Vitamix! I used to have a Ninja and it doesn’t even compare when you’re making things like green smoothies, “nice” cream, almond butter, nut milks, and more! If you think it’s too expensive, it’s actually not when you consider it as an investment in your health and consider it’s lifespan; it’s totally worth the price! However, if the price is a concern, you can save a lot by buying a certified refurbished one which comes with a brand new pitcher and 5 year warranty and works just like new. A brand new A2500 Vitamix is $519, but this summer sale lets you get a certified refurbished one for ONLY $279! Personally, I’m currently using the S55 personal sized Vitamix, but only because it’s smaller so I could pack it in my suitcase to bring to Iraq. It’s a good option if you’re just blending for 1 or 2 people and don’t want to take up a lot of counter space.

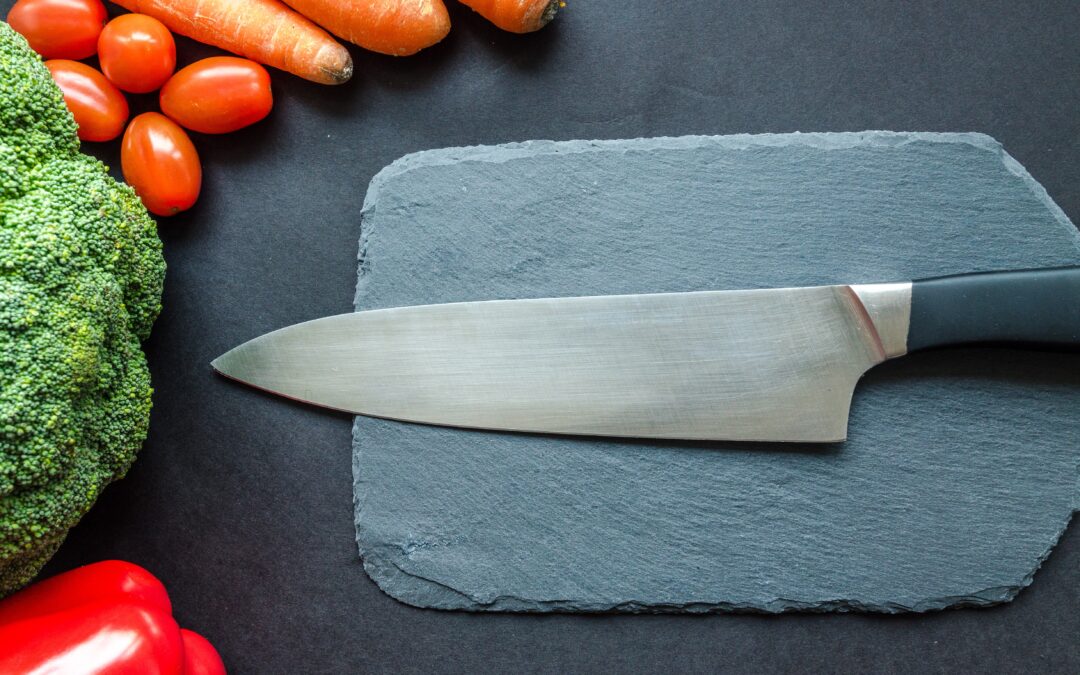
2. Vegetable Knife → I waited too long to buy a good knife. Having a high quality knife will save you a lot of time and make meal prep much easier! The one I use and love is by Global.

3. Instapot → This pressure cooker, slow cooker in one, plus yogurt maker. 

4. Spice grinder — Most coffee grinders also serve as a spice grinder, but you probably want to have a separate grinder for spices. In addition to making fresh curry powders, I use mine for grinding seeds, such as toasted sesame seeds, pumpkin seeds, and/or flax seeds to add to my oatmeal (and you should always buy the whole flax seeds and grind them yourself to avoid oxidation, unless you’re buying sprouted flax — which is my go-to as I also prefer the taste; check out my post about flax seeds to learn why you should have at least 1 Tbsp a day). I also use it to make my go-to plant-based parmesan “cheese” by Minimalist Baker (which is ground cashews and nutritional yeast with a little salt and garlic powder).

5. Microplane zester → I use this for grating ginger to add to various dishes from oatmeal to stir fries, but most mornings I grate some fresh ginger and squeeze the pulp through my fingers to add fresh ginger juice to my lemon water. The microplane is also excellent for grating lemon and other citrus peel, which have 5-10 times more vitamins than the citrus fruit itself and citrus peel has been linked to cancer prevention. You can also freeze your citrus peel for later use.

6. Spiralizer → The spiralizer I’ve linked to is great because of its compact size. If you haven’t yet tried zucchini noodles, they are a great way to add more veggies to your diet; just spiralizer and lightly saute then toss with some pasta sauce, such as this lentil bolognese sauce. You can also use the spiralizer for carrots and other veggies to make nice garnishes


Note: This post contains affiliate links, which means if you purchase through my link I’ll get a small kick-back, while the price will be exactly the same for you (thanks for supporting me by using my links if you’re interested in purchasing any of these items!)


Additional reading: